Create a project
For: Coordinators
Whole guide as PDF (3 MB)- Open Projects and press New project at the top right.
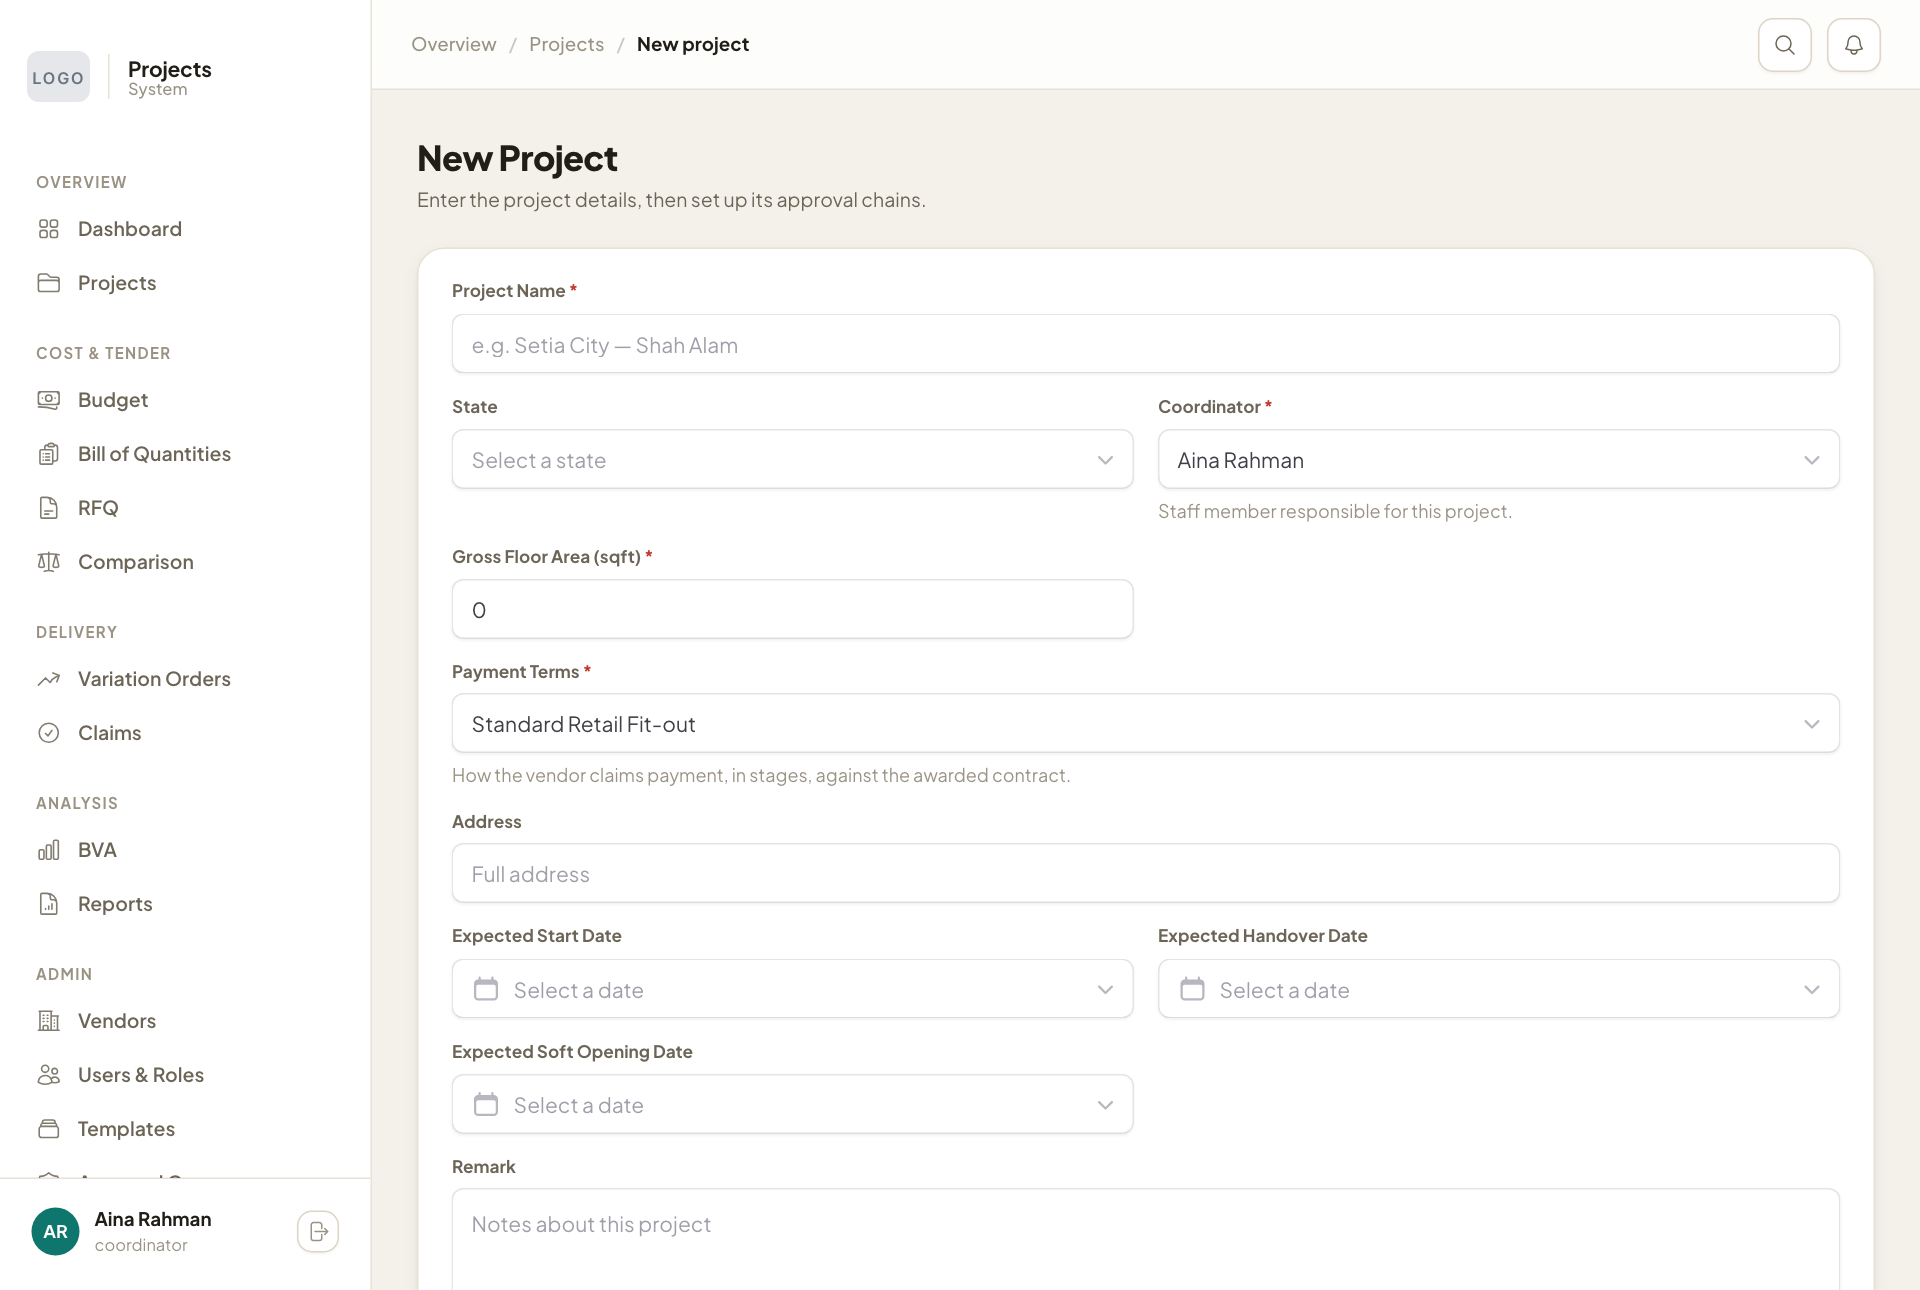
- Fill in Project Name and Gross Floor Area (sqft). Both are required.
- Check Coordinator. It starts with your name; pick someone else if they will run the project.
- Pick the Payment Terms. This decides the stages in which the vendor will be paid (for example down payment, progress, balance and retention).
- Add the State, Address, the three expected dates and a Remark if you have them.
- Press Next: Approvals.
Choose who approves
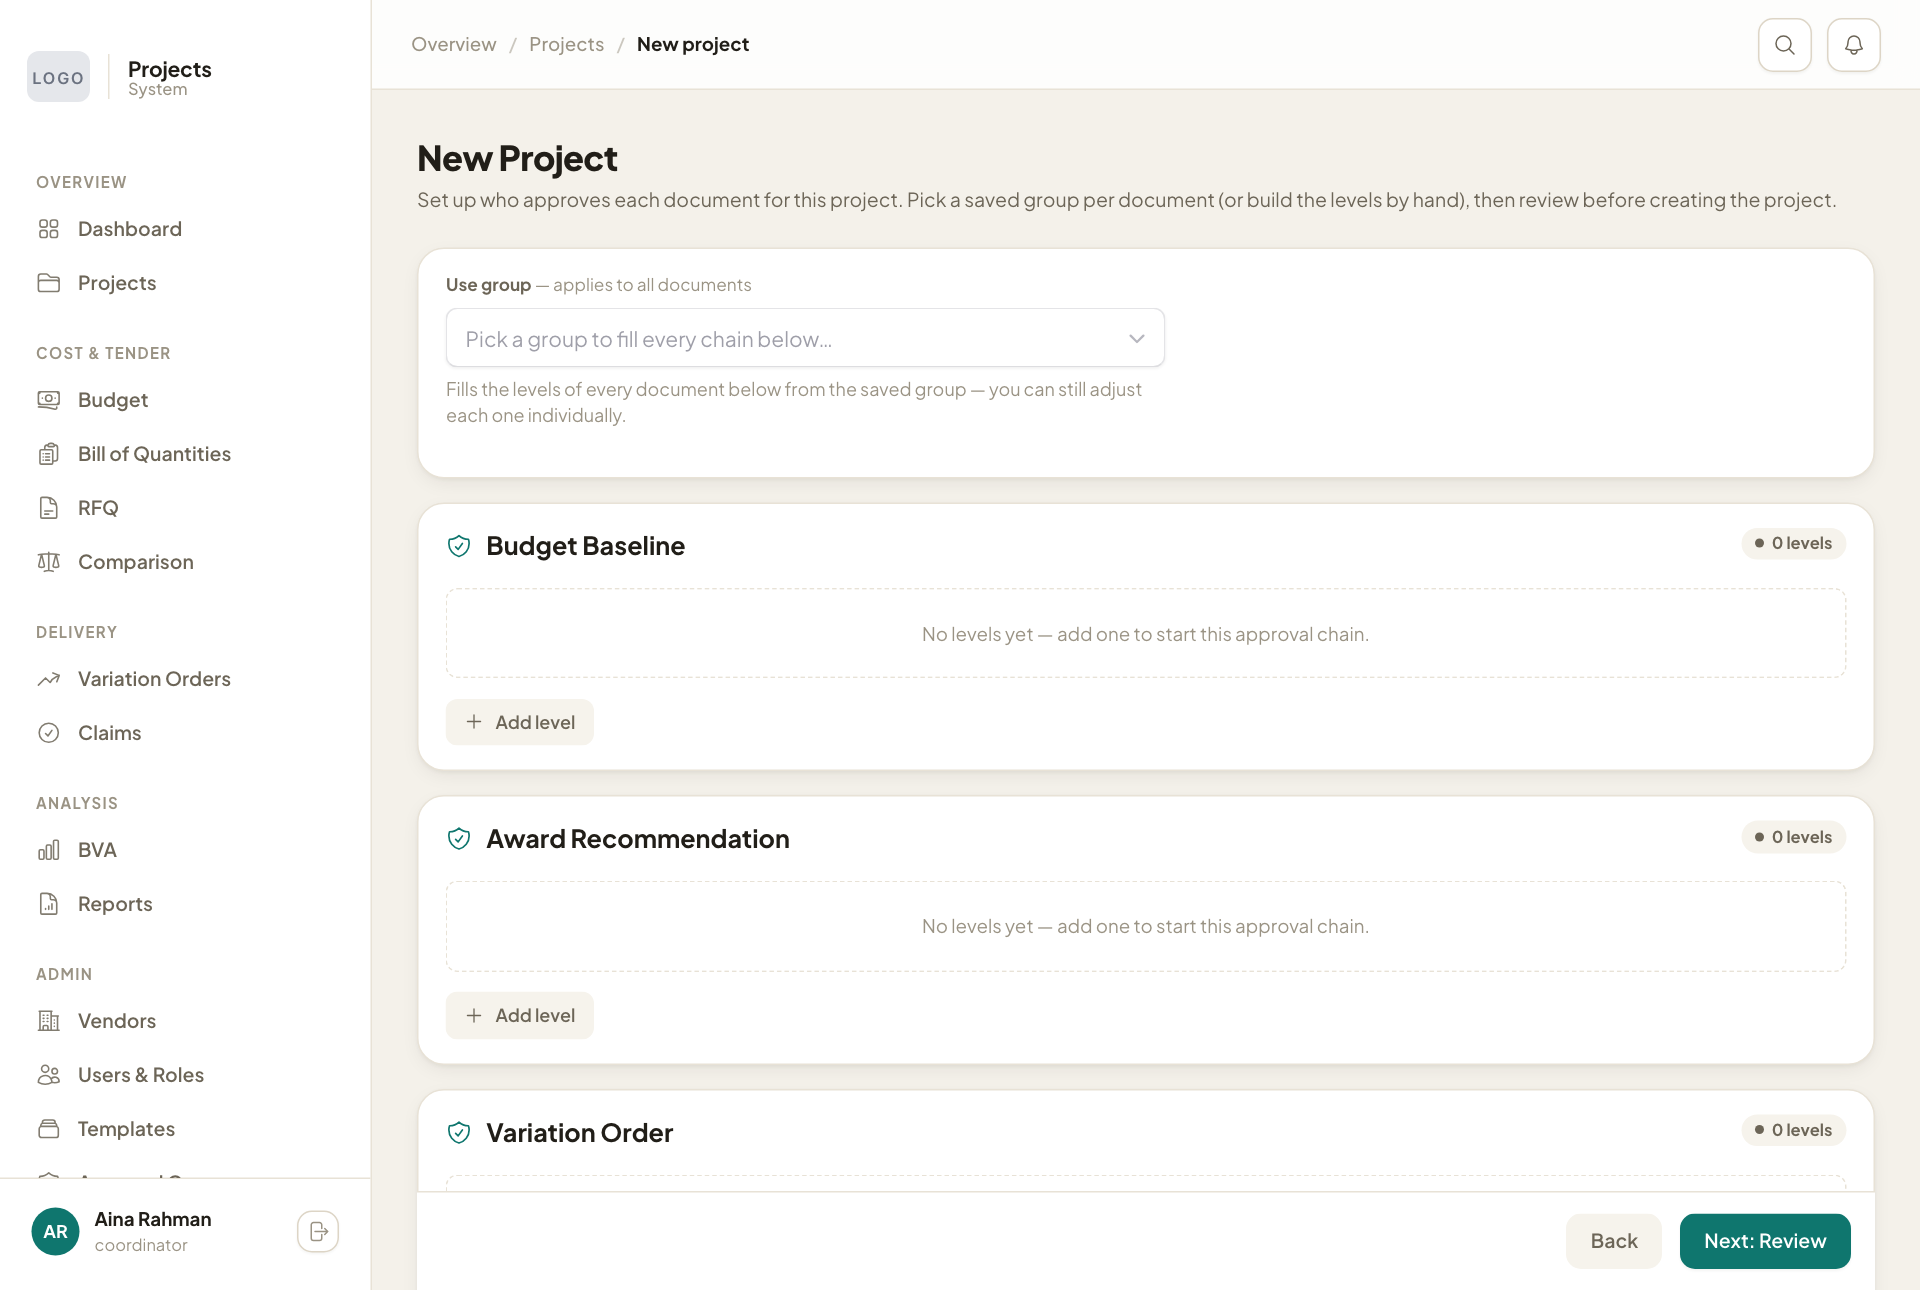
The second step lists every document of the project: budget, award, variation order, progress claim, final claim, milestone certification and retention release. Each starts empty.
- In Use group, pick a saved group. It fills every document's approval chain at once.
- Change any single document if it needs different approvers, with Add level or Remove.
- Press Next: Review, check the summary, and create the project.
Every document needs at least one level before you can continue. If no saved group fits, ask an administrator to add one under Group Templates.
You can change the details later with Edit on the project card. The approval chains lock once the project's budget is approved.